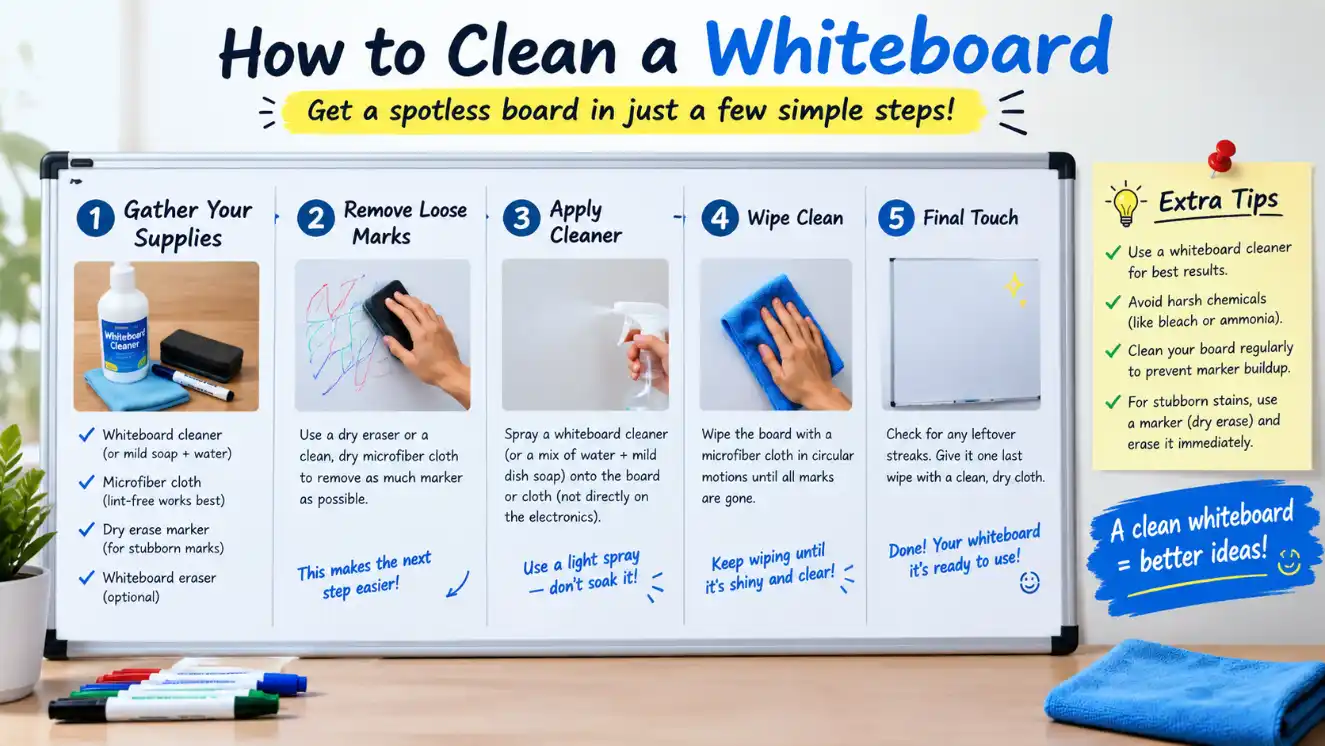
If your whiteboard has seen better days covered in faint gray “ghosts” of old notes, stubborn marker stains, or that dull, hazy film that no amount of erasing seems to fix, you’re not alone. Whiteboards take a beating. Between daily use, the wrong markers, and cleaning products that do more harm than good, even the best boards start to look tired fast.
The good news? Most whiteboard damage isn’t permanent, and restoring your board doesn’t require expensive equipment or harsh chemicals. With the right technique and a few household products you probably already have, you can erase ghosting, lift stubborn stains, and even rescue a board hit with permanent marker.
In this guide, we’ll walk through everyday cleaning habits, deep-cleaning methods for tough stains, and prevention tips to keep your whiteboard looking new for years to come.
Understanding Your Whiteboard
Before grabbing a cleaner, it helps to know what you’re working with. Not all whiteboards are made the same, and using the wrong method can cause more damage than good.
Most whiteboards fall into one of four categories:
- Melamine: The most common and budget-friendly option, often found in offices and classrooms. It’s durable but more prone to ghosting and staining over time, especially with heavy use.
- Porcelain (enamel): A premium, magnetic surface baked onto steel. It resists staining and ghosting far better than melamine and can last for decades with proper care.
- Glass: Sleek and modern, glass boards are non-porous, so they resist ghosting almost entirely and are easy to wipe clean.
- Painted steel: A more affordable magnetic option, but the surface is softer and more susceptible to scratches and marker buildup.
Most staining and ghosting issues come down to three culprits: using the wrong type of marker (like permanent instead of dry-erase), leaving ink on the board too long, and cleaning with abrasive tools or harsh chemicals that wear down the surface. Knowing your board type will help you choose the safest, most effective cleaning method in the sections ahead.
Everyday Maintenance (Daily/Weekly Cleaning)
The single best thing you can do for your whiteboard is build a simple cleaning habit. Most ghosting and staining happens because ink is left on the board far longer than it should be. A quick wipe-down at the end of each day (or after each use, if you’re using the board heavily) prevents marker residue from bonding to the surface.
For everyday cleaning, skip paper towels and tissues. Their fibers are slightly abrasive and can create micro-scratches over time, which actually makes future staining worse. Instead, reach for a microfiber cloth or a proper felt eraser, both of which lift ink cleanly without damaging the surface.
If dry wiping doesn’t fully remove the marks, dampen your cloth with one of these:
- Water fine for light, fresh marker residue
- Isopropyl alcohol great for daily use; evaporates quickly and doesn’t leave streaks
- A dedicated whiteboard cleaning spray formulated specifically to lift ink without degrading the surface
When wiping, use straight, overlapping strokes in one direction rather than circular scrubbing; this helps prevent the swirling, hazy residue that builds up on frequently used boards. Let the surface air-dry fully before writing on it again, since writing on a damp board can smear ink into the surface.
This simple daily habit wipe, spray if needed, dry is the most effective defense against ghosting and buildup before it ever becomes a deep-clean problem.
Deep Cleaning (Removing Stubborn Marks & Ghosting)
Even with regular maintenance, most whiteboards eventually develop ghosting faint gray shadows left behind after erasing, especially in spots that get written over repeatedly. Unlike fresh marker residue, ghosting is ink that has settled into micro-pores on the surface, so it needs a slightly stronger approach to lift.
Start with isopropyl alcohol on a microfiber cloth, working in small circular motions over the ghosted area, then wiping clean with a dry cloth. For tougher spots, white vinegar diluted with water (roughly a 1:1 ratio) works as a gentle, non-abrasive alternative that cuts through buildup without harming the surface.
Another surprisingly effective trick: hand sanitizer. The alcohol content breaks down old ink, and the light gel texture gives you a bit more working time on stubborn areas compared to a spray.
If ghosting persists, try the “dry-erase over dry-erase” method color over the ghosted area with a fresh dry-erase marker, then immediately wipe it away while the ink is still wet. The new marker’s solvents help re-dissolve the old, bonded ink.
For widespread or long-neglected staining, a commercial whiteboard cleaner or restorer spray is worth the investment; these are formulated specifically to break down set-in residue without degrading the board’s coating.
Whichever method you use, always finish with a clean, dry microfiber cloth to buff the surface and prevent streaking, then let it air-dry fully before writing on it again.
Removing Permanent Marker by Accident
It happens to almost everyone: you grab the wrong marker, write a note, and realize seconds too late that it’s permanent, not dry-erase. Don’t panic in most cases, this is fixable, especially if you act quickly before the ink fully sets into the surface.
The fastest fix is the dry-erase marker trick: trace directly over the permanent marker lines with a fresh dry-erase marker, then wipe immediately with a cloth while the ink is still wet. The solvents in dry-erase ink are often strong enough to break down the permanent marker and lift both away together. This may take two or three passes for stubborn lines.
If that doesn’t fully work, move to rubbing (isopropyl) alcohol on a microfiber cloth, applying light pressure and working in small circles. This handles most residue that the marker trick leaves behind.
For particularly stubborn stains, acetone-based nail polish remover can be effective but use it cautiously. Acetone is strong enough to damage some whiteboard coatings, particularly on lower-quality melamine boards, so always test it in a small, inconspicuous corner first.
A Magic Eraser (melamine sponge) can also lift permanent markers, but using gentle pressure only its mildly abrasive texture can dull glossy surfaces or create fine scratches with repeated use.
Whatever method you choose, always test in a hidden spot first, work gently, and avoid scrubbing hard, which can push ink deeper into the surface rather than lifting it out.
Dealing with Specific Stains/Issues
Not all whiteboard problems are the same, and different issues call for slightly different fixes.
Marker ghosting/shadowing: As covered earlier, this faint gray residue comes from ink settling into the surface over time. Isopropyl alcohol or the dry-erase-over-dry-erase trick usually resolves it. For boards with heavy, long-term ghosting, repeated light treatments work better than one aggressive scrub.
Greasy fingerprint smudges: These are common on boards handled frequently near the edges. A small amount of dish soap diluted in water cuts through oils effectively with a soft cloth, then wiped with a clean, damp cloth to remove soap residue, and dry thoroughly.
Sticky residue from tape or adhesive: Rubbing alcohol is usually enough to dissolve adhesive residue. For stubborn spots, let the alcohol sit on the area for 20–30 seconds before wiping, rather than scrubbing immediately.
Discoloration from sunlight or age: Yellowing is typically UV damage to the surface coating itself, not surface dirt, so cleaning products won’t fully reverse it. Repositioning the board out of direct sunlight can slow further discoloration, though a whiteboard polish may improve the surface’s appearance slightly.
Scratches: Fine scratches can’t be removed, but a whiteboard restorer or polish can fill them in slightly and minimize their visibility, along with improving how smoothly markers glide across the surface.
Identifying which issue you’re dealing with helps you avoid over-treating the board or reaching for a product that’s stronger than necessary.
Tools & Products Roundup
Having the right supplies on hand makes whiteboard care faster and far more effective and using the wrong ones is often what causes damage in the first place.
What to use:
- Microfiber cloths: Gentle, lint-free, and reusable ideal for both daily wiping and deep cleaning.
- Felt erasers: Designed specifically for dry-erase ink; replace them regularly, since a dirty eraser just smears residue around instead of lifting it.
- Spray bottles: Useful for diluting your own alcohol or vinegar solutions and applying them evenly without oversaturating the board.
- Isopropyl alcohol: A go-to for both daily touch-ups and deeper ghosting removal.
- Dedicated whiteboard cleaner or restorer spray: Formulated specifically for whiteboard surfaces, these are the safest bet for regular deep cleaning.
What to avoid:
- Paper towels or tissues: Their fibers are mildly abrasive and can create micro-scratches over time.
- Abrasive sponges or scouring pads: These dull the surface and make future ghosting worse.
- Ammonia-based glass cleaners (like standard Windex): Can degrade certain whiteboard coatings, especially on melamine boards, with repeated use.
- Acetone on melamine boards: Effective at removing stains, but strong enough to strip the coating if used too often or too aggressively.
DIY vs. store-bought: A simple alcohol or vinegar solution works well for most routine and moderate cleaning needs and costs next to nothing. For heavily stained or aging boards, a commercial restorer is worth the investment, since it’s formulated to treat the surface rather than just lift ink.
Preventive Care Tips
The easiest way to deal with whiteboard damage is to prevent it in the first place. A few small habits go a long way toward keeping your board looking new for years.
Choose quality dry-erase markers. Cheap, low-quality markers tend to leave behind more residue and dry out faster, both of which contribute to ghosting. Investing in a reputable brand pays off in fewer stains and smoother writing.
Don’t let ink sit too long. The longer marker ink stays on the board, the more it bonds to the surface. Erasing notes within a day or two rather than leaving them up for weeks dramatically reduces ghosting over time.
Keep an eraser and cloth nearby. A board that’s easy to wipe gets wiped more often. Keeping supplies within reach encourages quick touch-ups instead of letting residue build up.
Avoid direct sunlight. UV exposure gradually yellows and weakens the surface coating, especially on melamine boards. If possible, position your whiteboard away from windows or direct light sources.
Use a whiteboard conditioner or polish periodically. These products restore surface shine, help markers glide more smoothly, and create a light protective layer that makes future cleaning easier.
Retire old markers. Dried-out or heavily used markers require more pressure to write with, which increases the chance of ink pressing deeper into the surface, a common contributor to stubborn staining.
Small, consistent habits like these prevent most major cleaning headaches before they start.
When to Replace vs. Restore
Even with proper care, whiteboards don’t last forever. Knowing when to invest in restoration versus when to simply replace the board can save you time, money, and frustration.
Signs a board is beyond saving:
- Ghosting covers most of the surface and doesn’t lighten even after deep cleaning
- The surface feels rough, pitted, or visibly scratched across large areas
- Markers no longer glide smoothly and instead “drag” or skip
- Ink appears to soak into the board rather than sitting on top of it
- Yellowing or discoloration is widespread rather than isolated to one section
These signs typically point to a surface coating that has broken down at a structural level, something cleaning products can improve slightly but can’t fully reverse.
Restoring vs. replacing:
If damage is moderate some ghosting, minor scratches, dulled shine a whiteboard restorer kit or resurfacing film can extend the board’s life significantly for a fraction of the cost of a new one. These kits typically apply a fresh coating directly over the existing surface.
If the board is heavily damaged, very old, or a low-quality melamine board to begin with, replacement is often more cost-effective than restoration, especially since new boards (particularly porcelain) can last many years with proper care.
As a general rule: if cleaning only offers cosmetic improvement and the board is no longer pleasant or reliable to write on, it’s time to consider a replacement.
FAQs
Can I use Windex on a whiteboard?
It’s best to avoid ammonia-based glass cleaners like standard Windex, especially on melamine boards. Over time, ammonia can break down the surface coating, making the board more prone to staining and ghosting. Stick to isopropyl alcohol or a dedicated whiteboard cleaner instead.
Why is my whiteboard turning pink or yellow?
This discoloration is usually caused by UV exposure from sunlight breaking down the surface coating, or from certain marker pigments (especially red) leaving behind a subtle stain over time. Unfortunately, this type of discoloration is often permanent, though repositioning the board away from direct light can slow further yellowing.
Is Magic Eraser safe for whiteboards?
It can be, but use it sparingly and with light pressure. Magic Erasers are mildly abrasive, and frequent use can dull the surface’s glossy finish or create fine scratches, which ironically leads to more staining down the road.
How do I get rid of ghosting for good?
Light ghosting can usually be lifted with isopropyl alcohol or the dry-erase-over-dry-erase trick. However, if ghosting has set in deeply over months or years, it may never fully disappear in these cases, a whiteboard restorer kit or resurfacing film offers the best improvement.
How often should I clean my whiteboard?
Ideally, wipe it down after each use or at least once daily to prevent ink from bonding to the surface. A deeper clean once a week or every other week helps catch anything daily wiping misses.
Conclusion
A whiteboard doesn’t have to look tired, stained, or covered in ghosting forever. With the right daily habits, quick wipe-downs, quality markers, and not letting ink sit too long you can prevent most damage before it starts. And when stains, ghosting, or the occasional permanent marker mishap do happen, a simple deep clean using isopropyl alcohol, vinegar, or a dedicated whiteboard cleaner can restore your board’s surface without expensive equipment or harsh chemicals.
The key is matching the right method to the problem: light daily maintenance for everyday marks, deeper treatments for stubborn ghosting, and restorer kits or replacement when a board is truly past its prime. With consistent care, your whiteboard can stay bright, smooth, and easy to write on for years to come.
A little maintenance now saves a lot of scrubbing later so grab a cloth, and give your board the refresh it deserves.

I am James Patterson an American writer sharing thoughtful insights on dreams, spirituality, personal growth, and everyday life through practical guides and meaningful stories for SpiritualDreamz.com readers everywhere with warmth.